Home Assistant, CBus, MQTT, Philips Hue and more

This has been a coding adventure.
My aim? Simple, really: Get Home Assistant talking to CBus, replacing 'MisterHouse', which on my network dates from ten years ago (and is a non-maintained pig). And now dead to me.
My stretch goals? Add MQTT discovery for Home Assistant, to eliminate any manual CBus config there. Plus return to previously set lighting levels like MisterHouse used to do when a 'turn on' command was issued. And work out how I can include Philips Hue hub devices in CBus scenes, like having 'All Off' from a button, instead of relying on barking "Hey Google, turn everything off", which would also turn off my electric blankets (plus more that I didn't want turned off...)
Sooo... My initial goal, and all stretch goals have been achieved!
Plus the recent addition of Panasonic air conditioners and ESPHome sensors for temperature and relative humidity.
The pieces of the puzzle include:
- Home Assistant 'HAOS', running as a virtual machine. Home Assistant 'Core' as a container is not enough, as add-ins are required to get a MQTT broker and more going (but you could use a separately installed broker elsewhere on your network). HA Cloud talks to Google Assistant/Alexa.
- Home Assistant plug-ins: 'Mosquitto broker'. File editor is also handy.
- LUA code on a C-Bus Automation Controller (SHAC/NAC/AC2/NAC2)
If you don't care for integrating Philips Hue/AC/environmental devices with CBus, then the AC/ENV code can stay there and will just be unused, and don't deploy the HUE scripts.
Prepare Home Assistant
I don't cover installing Home Assistant here. You probably wouldn't be reading this if you weren't already an avid user, but if you are new then you want 'HAOS' installed somewhere (RPi, NUC, VM, old laptop, etc.), and the Googled how-to guide you want will depend on that 'somewhere'.
Install the official Mosquitto broker. First up, create a HomeAssistant user 'mqtt', and give it a password of 'password' (used in the MQTT send/receive script), and probably hide it so it doesn't appear on dashboards (it doesn't need to be admin). Then go to Settings, Add-ons, and from 'official' add-ons install and start Mosquitto. Any HA user can be used to authenticate to this Mosquitto instance, explaining the creation of the user 'mqtt'.
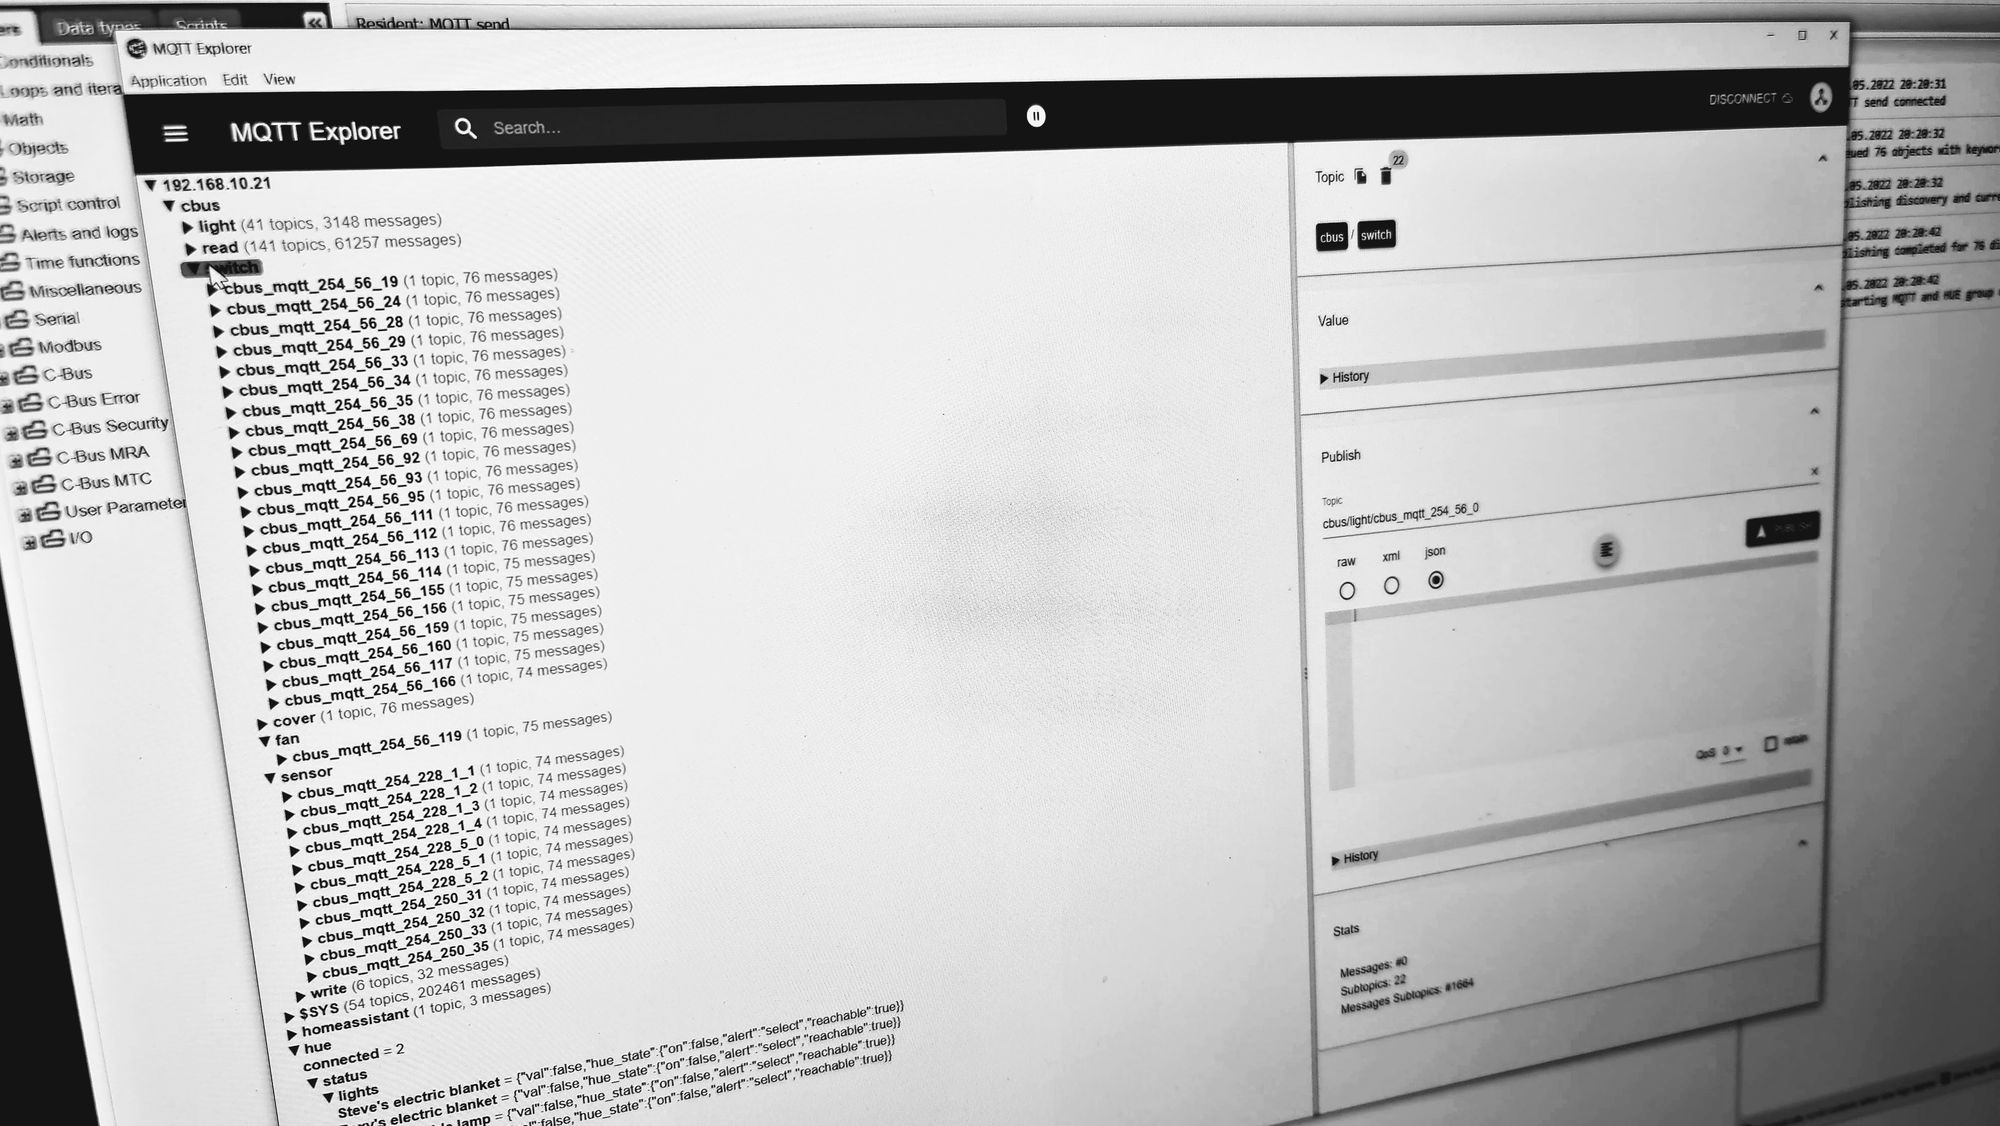
For me, 192.168.10.21 is the IP address of my Home Assistant server, which is now running a Mosquitto broker. 192.168.10.15 is my Philips Hue bridge (I set its IP address to fixed on my Unifi router by editing the client device, so DHCP always gives it the same address). These addresses are hard-coded in the AC scripts, so change to suit your environment.
If you want to, go grab MQTT Explorer by Thomas Nordquist at http://mqtt-explorer.com/, which is an excellent tool to gain visibility of what is going on behind the scenes. On second thought, definitely go grab it.
To the NAC / SHAC / AC
Honestly, this part of the puzzle was the hardest for me to get right. And I still don't know whether it's 100%, although it has proven itself quite reliable.
Grab all the scripts from GitHub.
First up, 'MQTT send receive' is a resident, zero sleep script, which handles sending and receiving MQTT topics as the name says, but also publishes discovery topics for CBus devices.
The comments at the top of this script explain how to set up CBus objects with the right keywords to have them integrated. Create new CBus objects for AC and ENV types. The README.md at GitHub also describes the required keywords.
Then I use two event-based scripts to monitor for changes to 'MQTT', and 'AC' objects tagged with those keywords. The MQTT script also saves the previously set level for lighting groups, enabling 'turn on' messages from Home Assistant to return them to a prior level.
98% of my home automation is CBus-based but like many, I would expect a few smart plugs and bedside lamps have crept in that are probably Philips Hue devices (Zigbee-based). Having them seamlessly integrated with CBus means that control by scenes or automation controller visualisations is possible. If you're using Home Assistant as the main automation platform then just use the Hue integraton, or if you want things like control from an "all off" CBus scene then deploy my Hue scripts.
So, for Philips Hue devices 'HUE send receive' is a resident, zero sleep script, which handles sending and receiving Hue bridge events using its REST API and synchronising state with CBus objects. And the event-based script 'HUE' looks for CBus changes monitoring the keyword 'HUE', triggering updates to the bridge.
For Hue devices again create new CBus objects and tag them following the guide in the script or README.md.
Once the HUE send receive script is running it will log messages indicating that the that link button on the Hue bridge needs to be pressed, so go press the button. The script should then log a successful connection, and store the client key for future use.
If some kind of monitoring of the MQTT and HUE send receive scripts is wanted, then create the script 'Heartbeat' as a resident zero sleep. This will look for heartbeat messages from those resident scripts and restart them if no message has been received for a specified duration.
On the reliability front, this "dead man" switch will re-start errant code, so transient issues will get sorted quickly and without intervention. To date, things are running most smoothly, without dead-man restarts, and with high performance and very low load on my NAC, so its probably overkill.
Script names are important for the Heartbeat code, so adjust as necessary by examining thoroughly if you need to change the names.
Back to Home Assistant
In Home Assistant add an MQTT integration from Settings | Devices & Services | Integrations pointing to your Home Assistant server IP address. Then edit /config/configuration.yaml in the Terminal or File Editor add-in, add the following and re-start HA. This will tell Home Assistant MQTT client to listen to the discovery prefix 'homeassistant', which should result in all your configured MQTT objects in the NAC/SHAC/AC to be discovered.
The cloud settings will make sure everything needed will get published to Google Home (or your favourite digital assistant by modifying to suit). Comment/un-comment as required.
mqtt:
  client_id: haos
  keepalive: 20

cloud:
  google_actions:
    filter:
      include_domains:
        - switch
#        - alarm_control_panel
        - binary_sensor
        - camera
        - climate
        - cover
        - fan
        - group
        - input_boolean
        - input_select
        - light
        - lock
#        - media_player
        - scene
        - script
        - sensor
        - switch
        - vacuum
And we're done
Well, done for now.
I hope I haven't forgotten to cover any step along the process. It's a non-trivial set up that honestly took way more hours than I envisaged.
The LUA code is quite mature and efficient now, with quite a few months running. Over that time corner cases have popped up and have been fixed, or efficiencies found. So is it done? I'm not calling it. 😅
The result makes me smile every day, having achieved everything that I set out to and more.
Cheers.
Article changes: (Like I said, it's been an adventure, which will probably continue as odd corner cases pop up and new ideas present, so I'll continue to evolve the content here.) Of note:
- May 2022: Added Hue dimmable devices and keyword change detection.
- July 2022: Added Panasonic A/C control and sensors via ESPHome esp32 devices (ditch your Comfort Cloud modules...), and environment sensors also via ESPHome. Added support for multiple CBus networks.
- August 2022: Added support for trigger control as HA buttons. Changed the discovery topic to homeassistant/. Merged last-level functionality into MQTT and HUE scripts.
- September 2022: Remove reliance on MQTT for Philips Hue integration.
Bonus example ESPHome .yaml files...
storeac.yaml:
esphome:
  name: storeac

esp32:
  board: esp32dev
  framework:
    type: arduino

# Enable logging
logger:
  level: INFO

# Enable Home Assistant API
api:
  encryption:
    key: "Pgefixa5xxxxxxxa0i8fKPGh9+KrKxxxxxxxGqZN96Q="

ota:
  password: "aa5ce34aaca9961e0xxxxxxx1bdf20ca"

wifi:
  ssid: !secret wifi_ssid
  password: !secret wifi_password

  # Enable fallback hotspot (captive portal) in case wifi connection fails
  ap:
    ssid: "Storeac Fallback Hotspot"
    password: "password"

captive_portal:

uart:
  tx_pin: GPIO17
  rx_pin: GPIO16
  baud_rate: 9600
  parity: EVEN

external_components:
  source: github://DomiStyle/esphome-panasonic-ac
  components: [panasonic_ac]

mqtt:
  broker: 192.168.10.21
  username: !secret mqtt_user
  password: !secret mqtt_password
  discovery: false

climate:
  - platform: panasonic_ac
    # For CZ-TACG1
    type: cnt

    name: Panasonic

    horizontal_swing_select:
      name: Horizontal Swing Mode
    vertical_swing_select:
      name: Vertical Swing Mode
    outside_temperature:
      name: Outside Temperature

    # Enable as needed
    # eco_switch:
    #   name: Panasonic AC Eco Switch
    # econavi_switch:
    #   name: Panasonic AC Econavi Switch
    # nanoex_switch:
    #   name: Panasonic AC NanoeX Switch
    # mild_dry_switch:
    #   name: Panasonic AC Mild Dry Switch
    # current_power_consumption:
    #   name: Panasonic AC Power Consumption

    # Useful when the ac does not report a current temperature (CZ-TACG1 only)
    # current_temperature_sensor: temperature_sensor_id
outsideenv.yaml:
esphome:
  name: outsideenv

esp32:
  board: esp32dev
  framework:
    type: arduino

# Enable logging
logger:
  level: INFO

# Enable Home Assistant API
api:
  encryption:
    key: "Pgefixa5xxxxxxxa0i8fKPGh9+KrKxxxxxxxGqZN96Q="

ota:
  password: "aa5ce34aaca9961e0xxxxxxx1bdf20ca"

wifi:
  ssid: !secret wifi_ssid
  password: !secret wifi_password

mqtt:
  broker: 192.168.10.21
  username: !secret mqtt_user
  password: !secret mqtt_password
  discovery: false

i2c:
  sda: 21
  scl: 22
  scan: true
  id: bus_a

sensor:
  - platform: sht3xd
    temperature:
      name: "Outside Temperature"
    humidity:
      name: "Outside Humidity"
    address: 0x44
    update_interval: 15s