Refinishing a leather steering wheel
I had a steering wheel that looked a bit second hand. Fair enough after all those years of pawing. So I refinished it... with some good stuff.


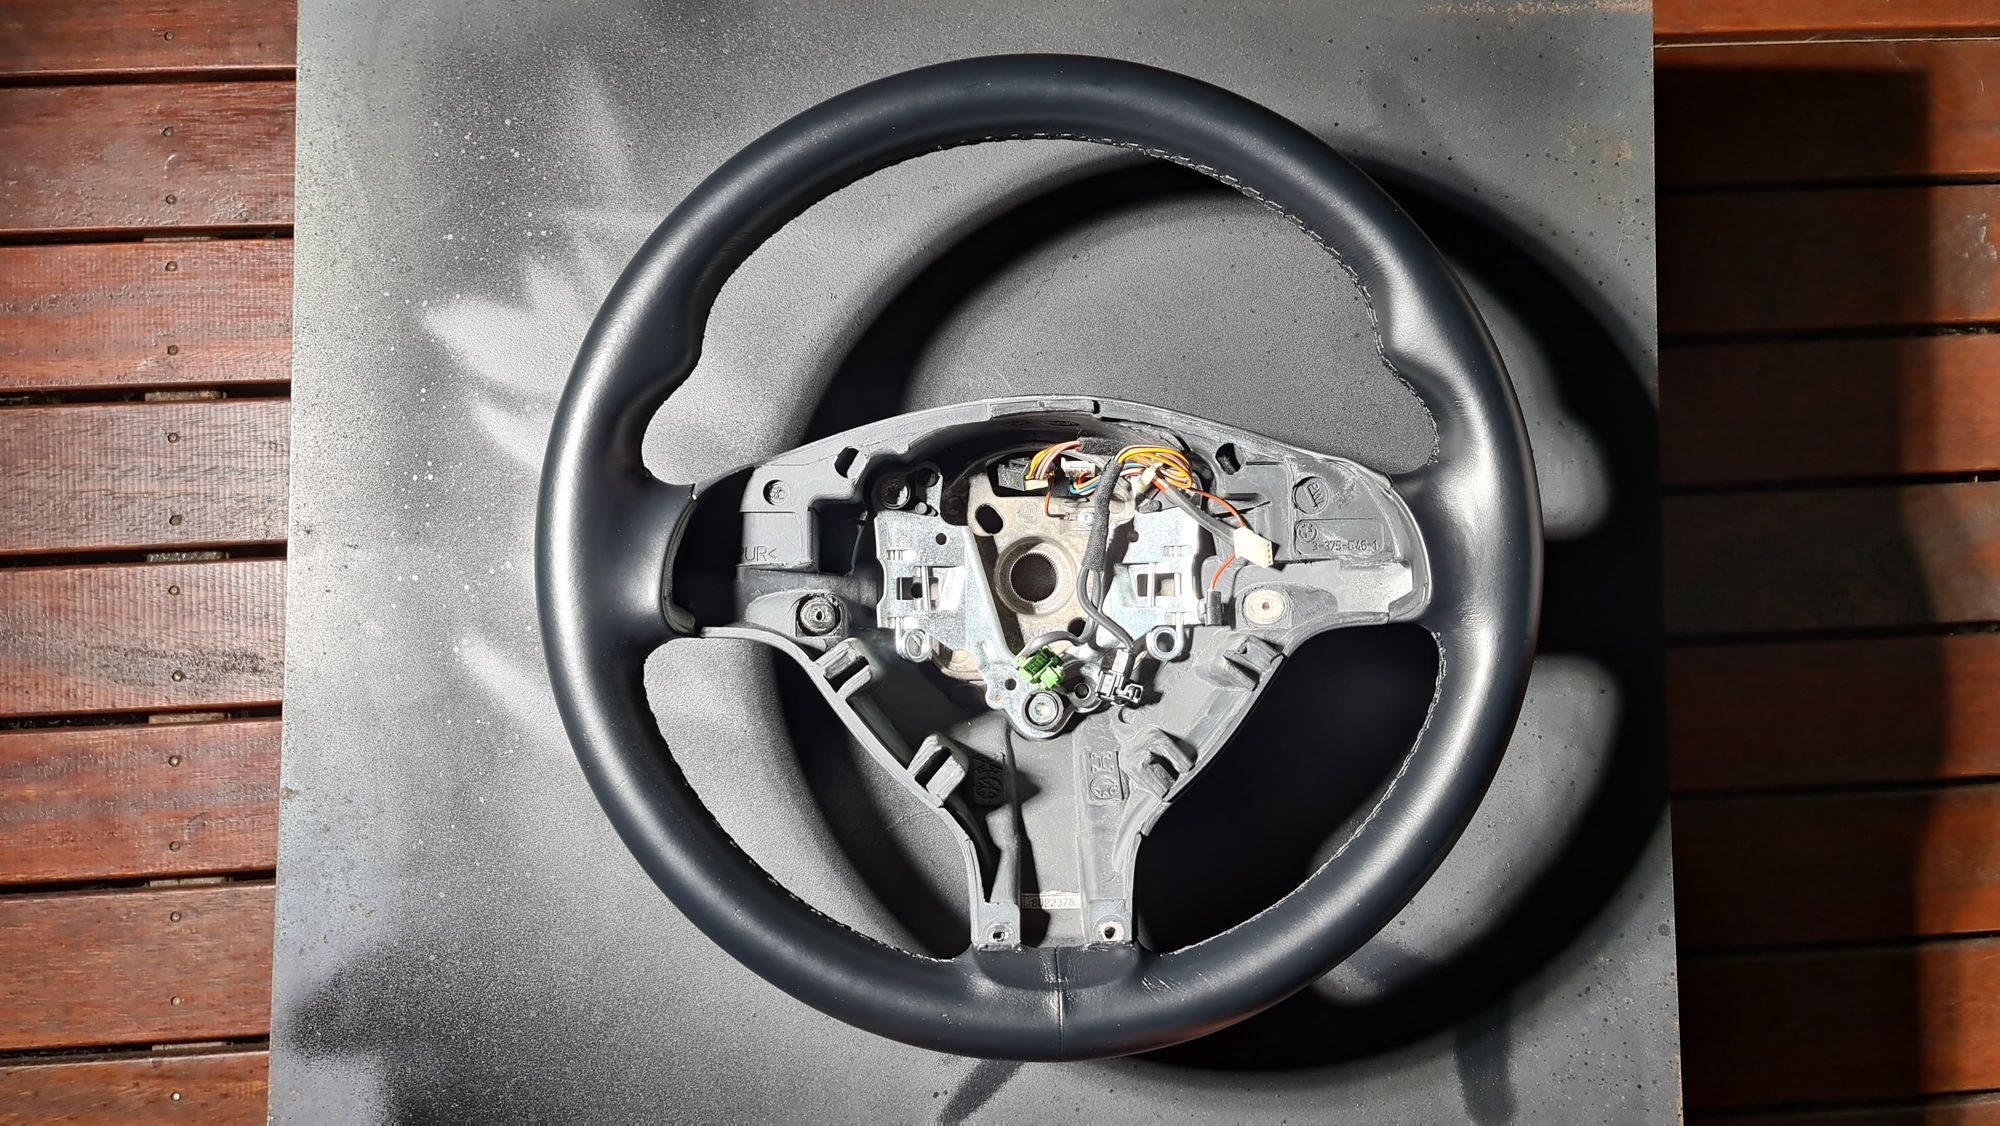
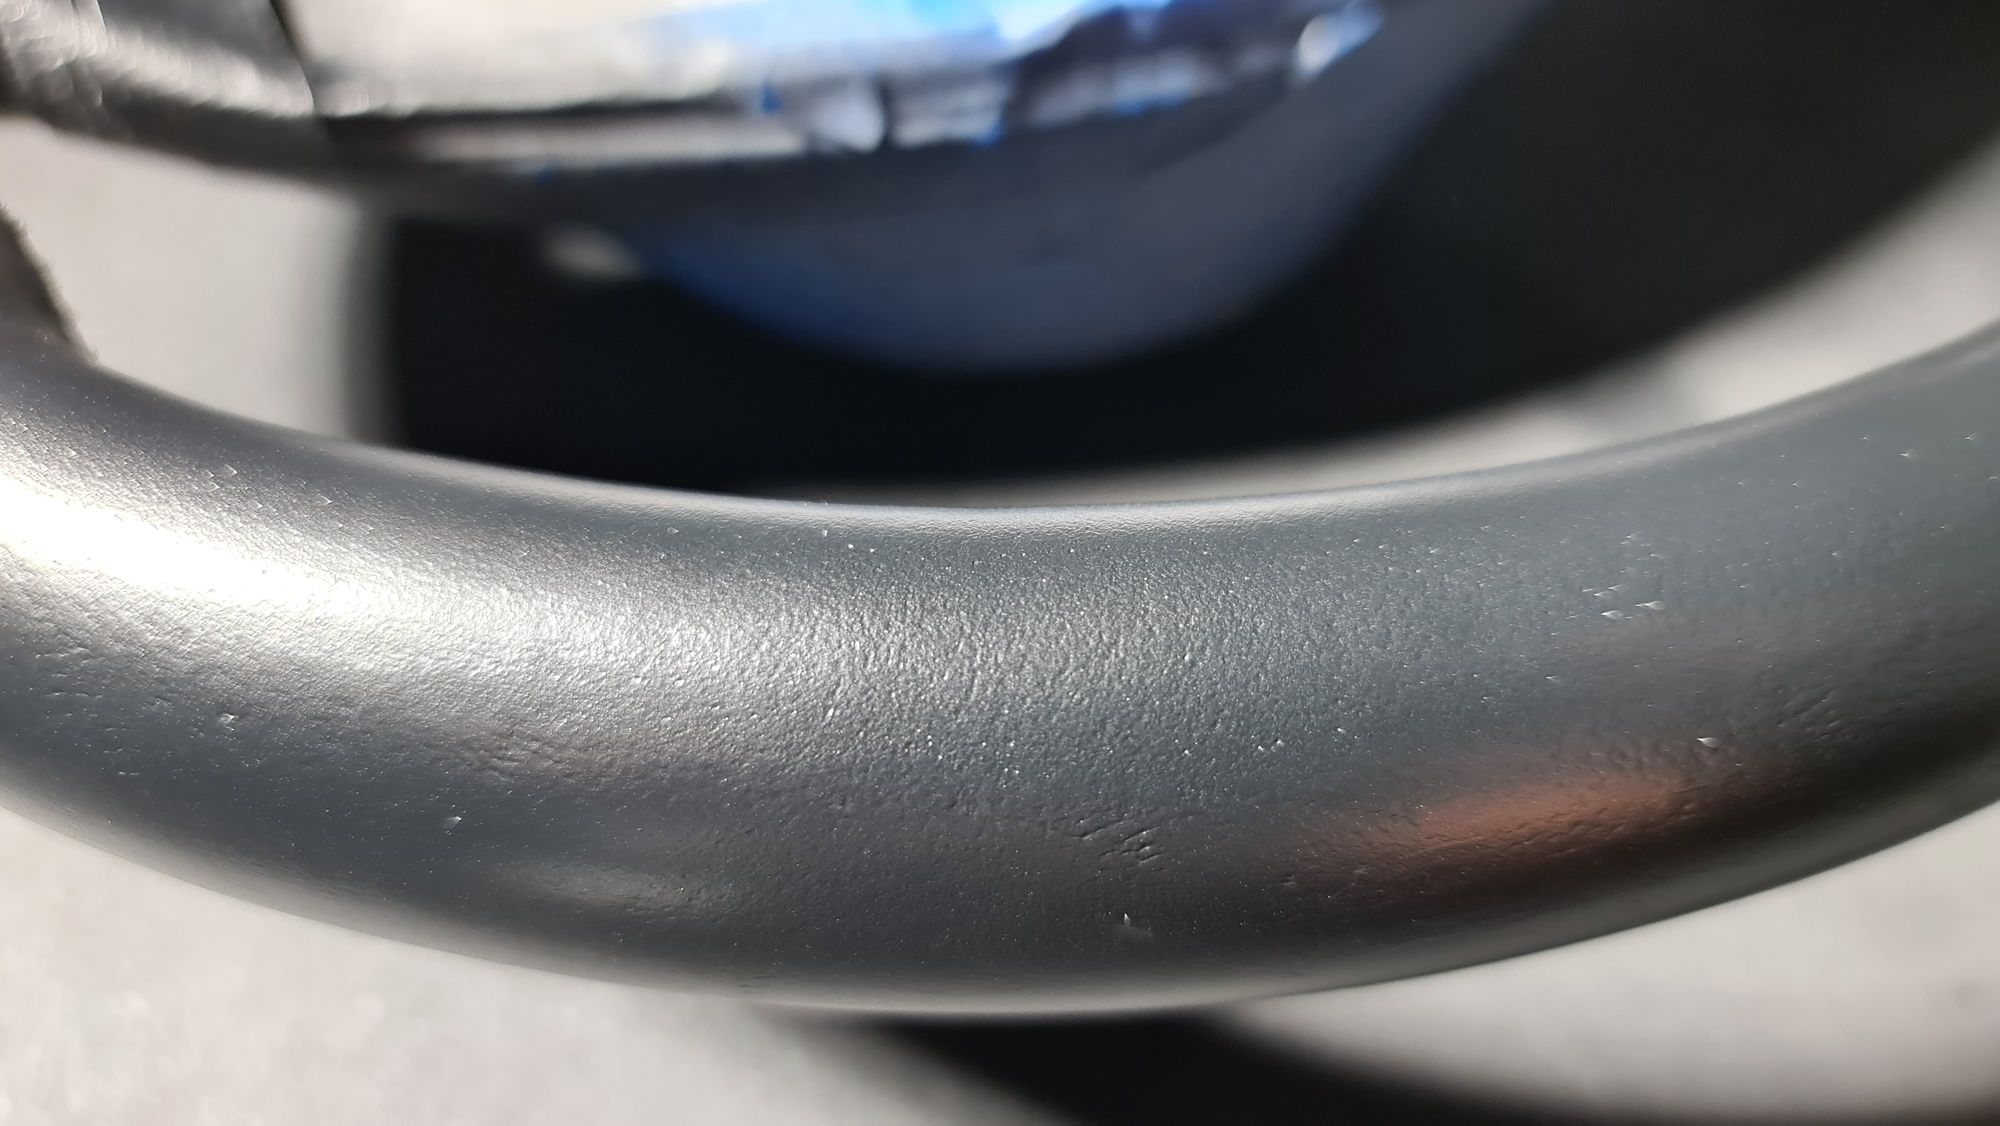
There's been much gripping and grabbing of Arraow's wheel over the years, so much of the top coat had worn off in places to reveal something quite nasty looking. And when giving it a thorough clean with Jay Leno's Garage all-purpose cleaner resulted in a greenish looking black dye transferring to the cleaning cloth it was, "Righto. Time to do something about that..."
So it was off to Supercheap Auto and grab some stuff to fix it up.
The steering wheel was taken off the car and filled, sanded and refinished. It was quite a simple thing to do, so I'm not sure why more people don't do this. Next to the seats, it's the most interaction one has with a car, so to have it all scuffed up and worn detracts from driving experience.
Left much longer, and the leather would have started to wear quite badly, so this was a timely restoration. I also replaced the M-Sport cover trim, which was scratched. $290 for that new, on top of $17 for spray coating, about $16 for wax and grease remover, filler and sandpaper from my shed, $6 for a tack cloth, and not that much time.
Remove
The wheel comes off the car. It has to.
Getting the wheel off is covered by many YouTube videos, so I won't bore you. It might be different for your car anyway. For my E46, a thin, long flathead screwdriver is required to remove the airbag (which is an aquired skill of pushing through a membrane-covered hole on a spring in the correct way, left side then right, and then a 16mm socket with an extension is all I needed to get it off, along with a T20 driver to remove the buttons and trim. The trick with the 16mm is to uncrew the wheel bolt with the steering lock engaged, mark stuff, then put the bolt back in a few turns, then wobble and yank the wheel towards you. Having the 16mm bolt still there, but loose means you won't smack the wheel into your head while yanking. Don't forget to disconnect the electrical connectors before doing so.
A warning: Once the airbag is removed, do not turn on your ignition. An airbag warning light will subsequently illuminate that requires a reset with a BMW scan tool, which you may not have, so keep the ignition off for the duration, or disconnect the battery.
Do mark the position that the wheel goes off/on before removal. You need to get that spot on later. A thin graphite pencil is perfect once you've removed the centre bolt for the first time so you can easily see where it goes back on to the same position. If it's been off before, then someone else will have most certainly marked it already, but if that's at all unclear, mark it again.
As an aside, it is surprising that there are very few YouTube videos about doing this kind of stuff, given how frequently people's steering wheels get fucked up over time. So I should have made one I guess, instead of this blog post... Sorry.
Prep and Finish
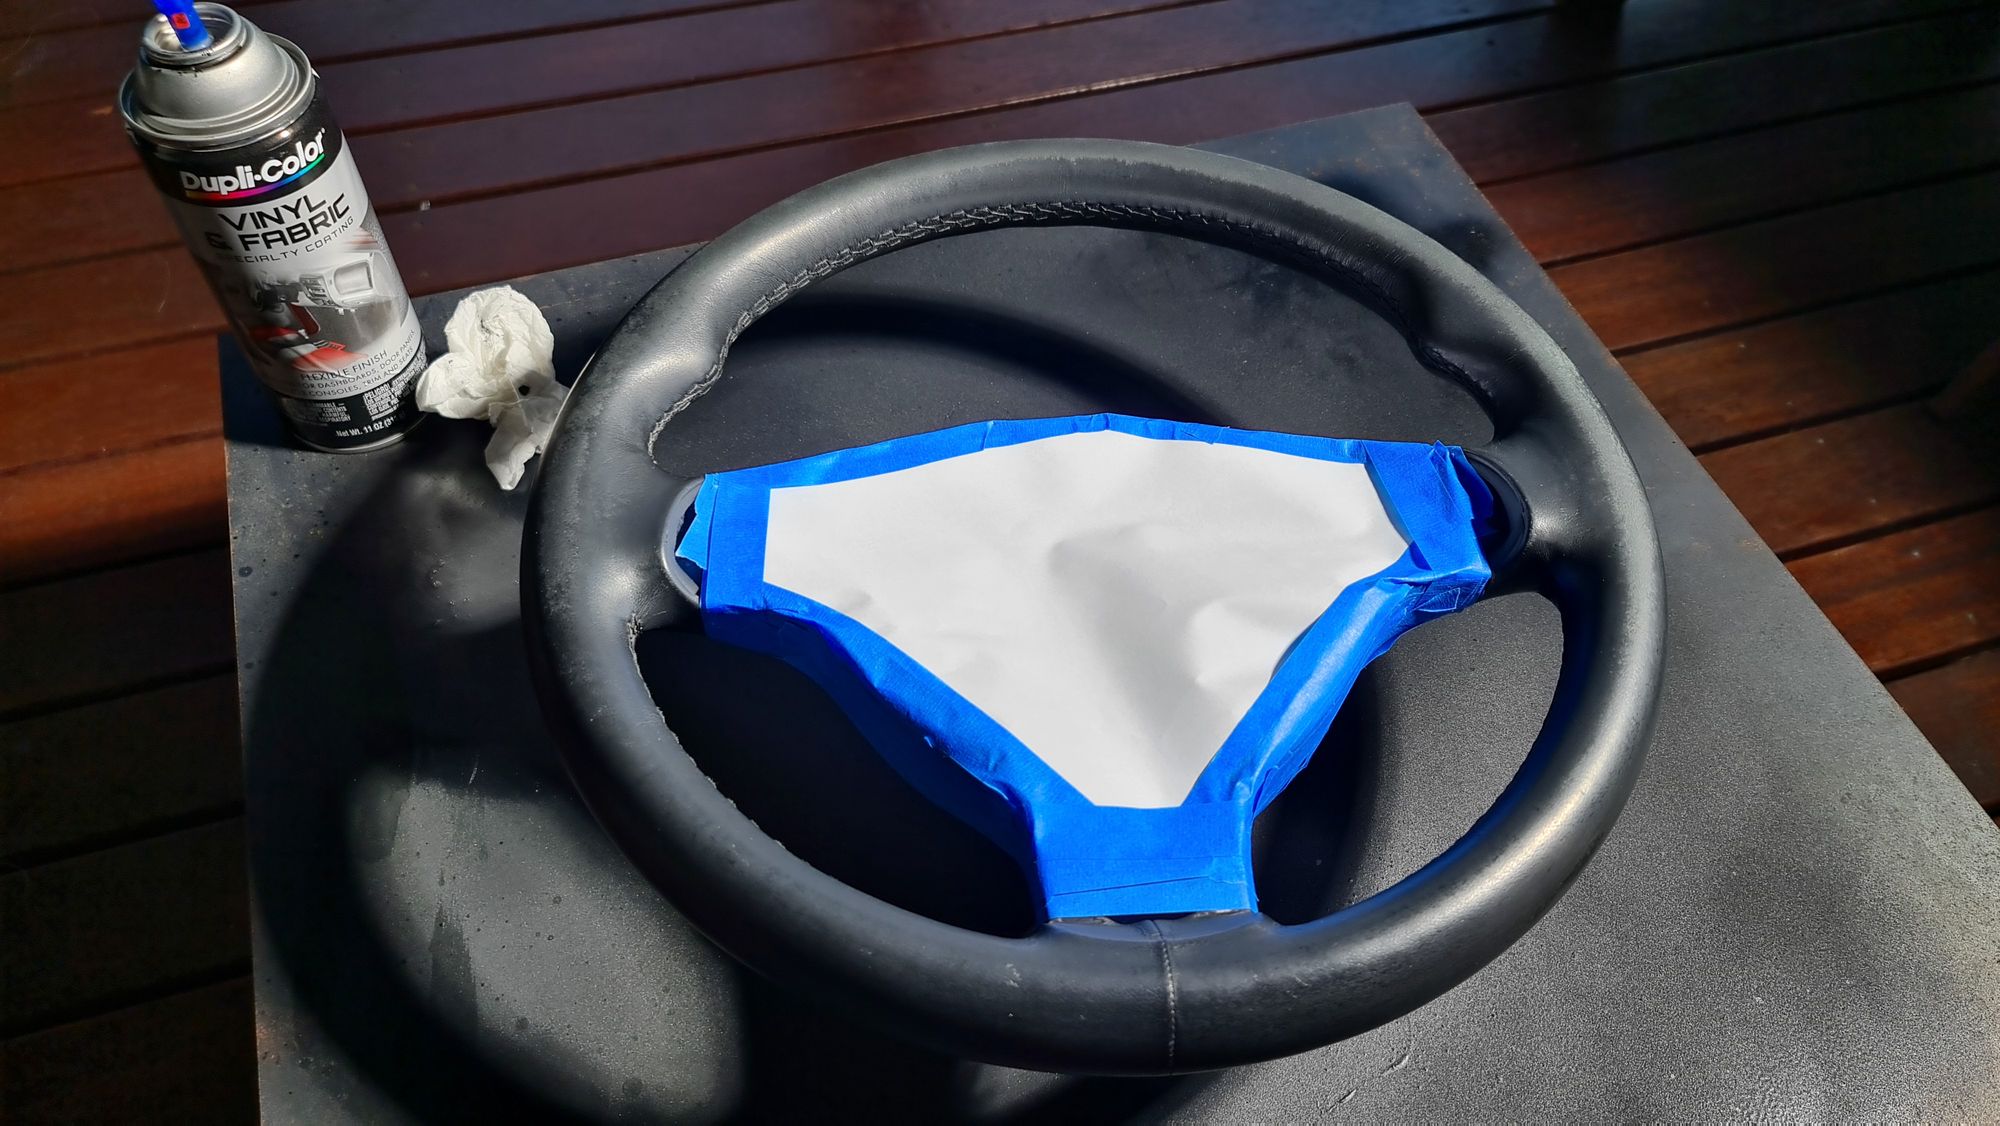
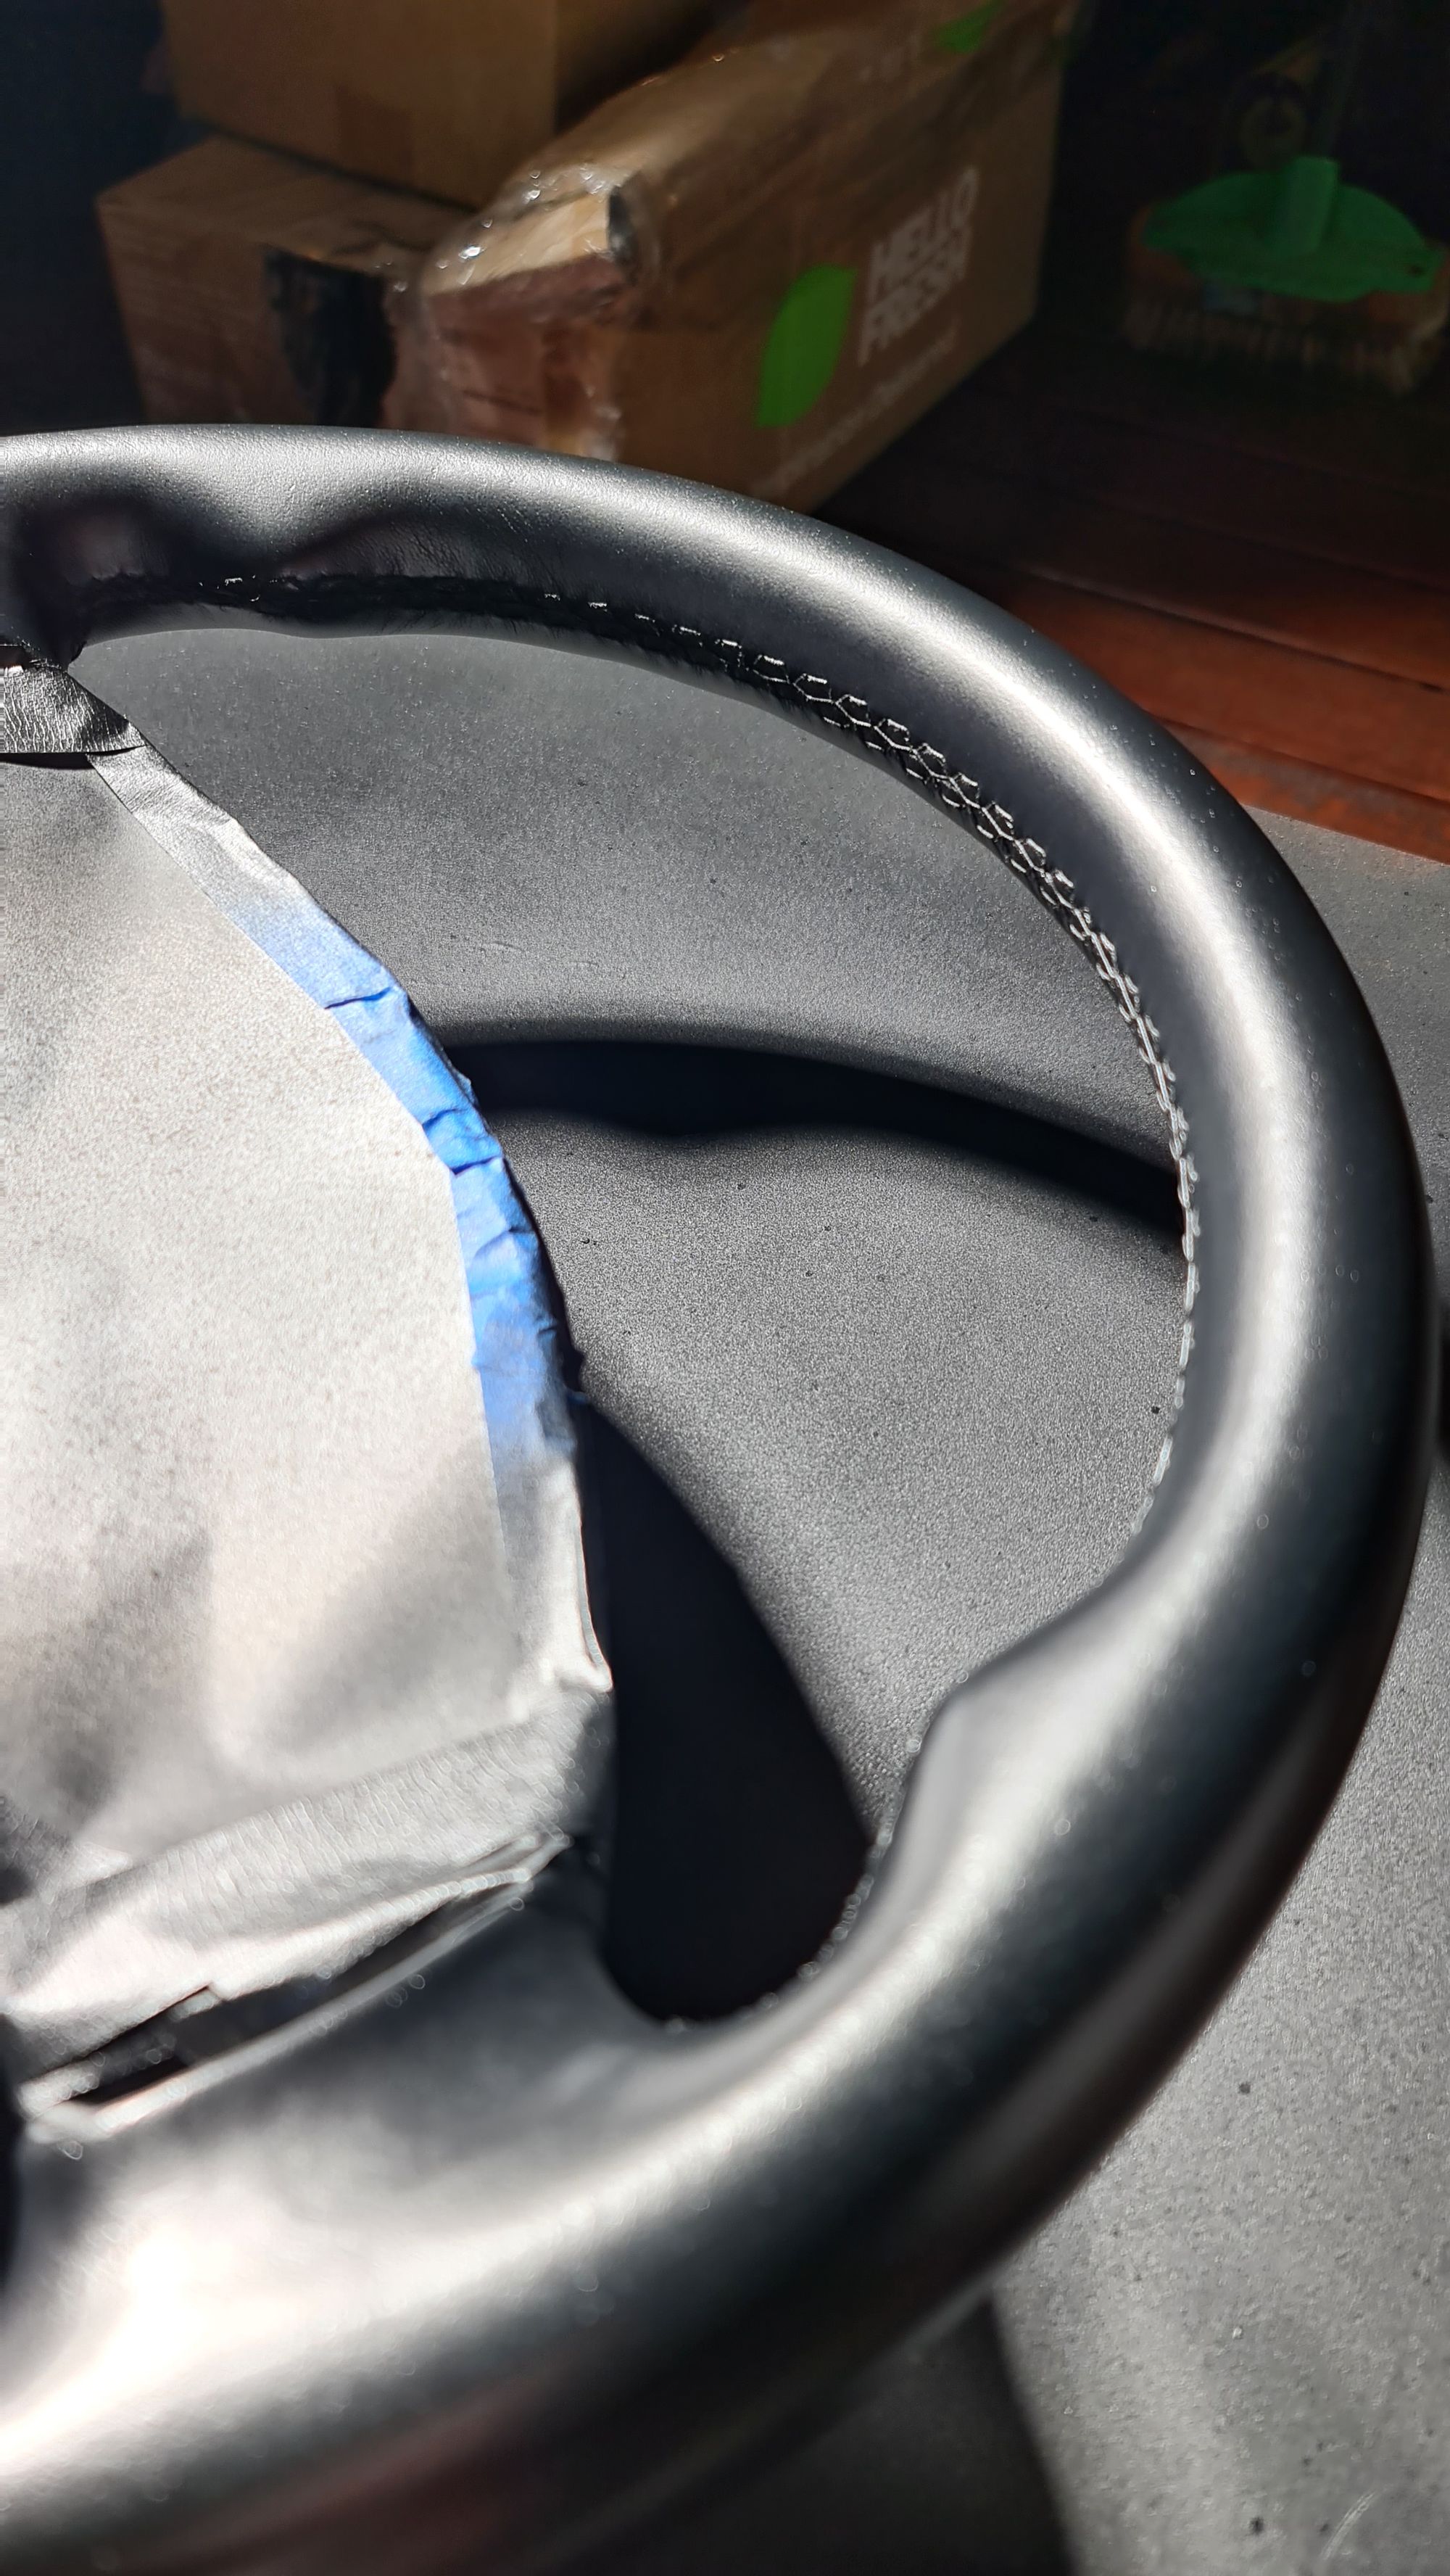
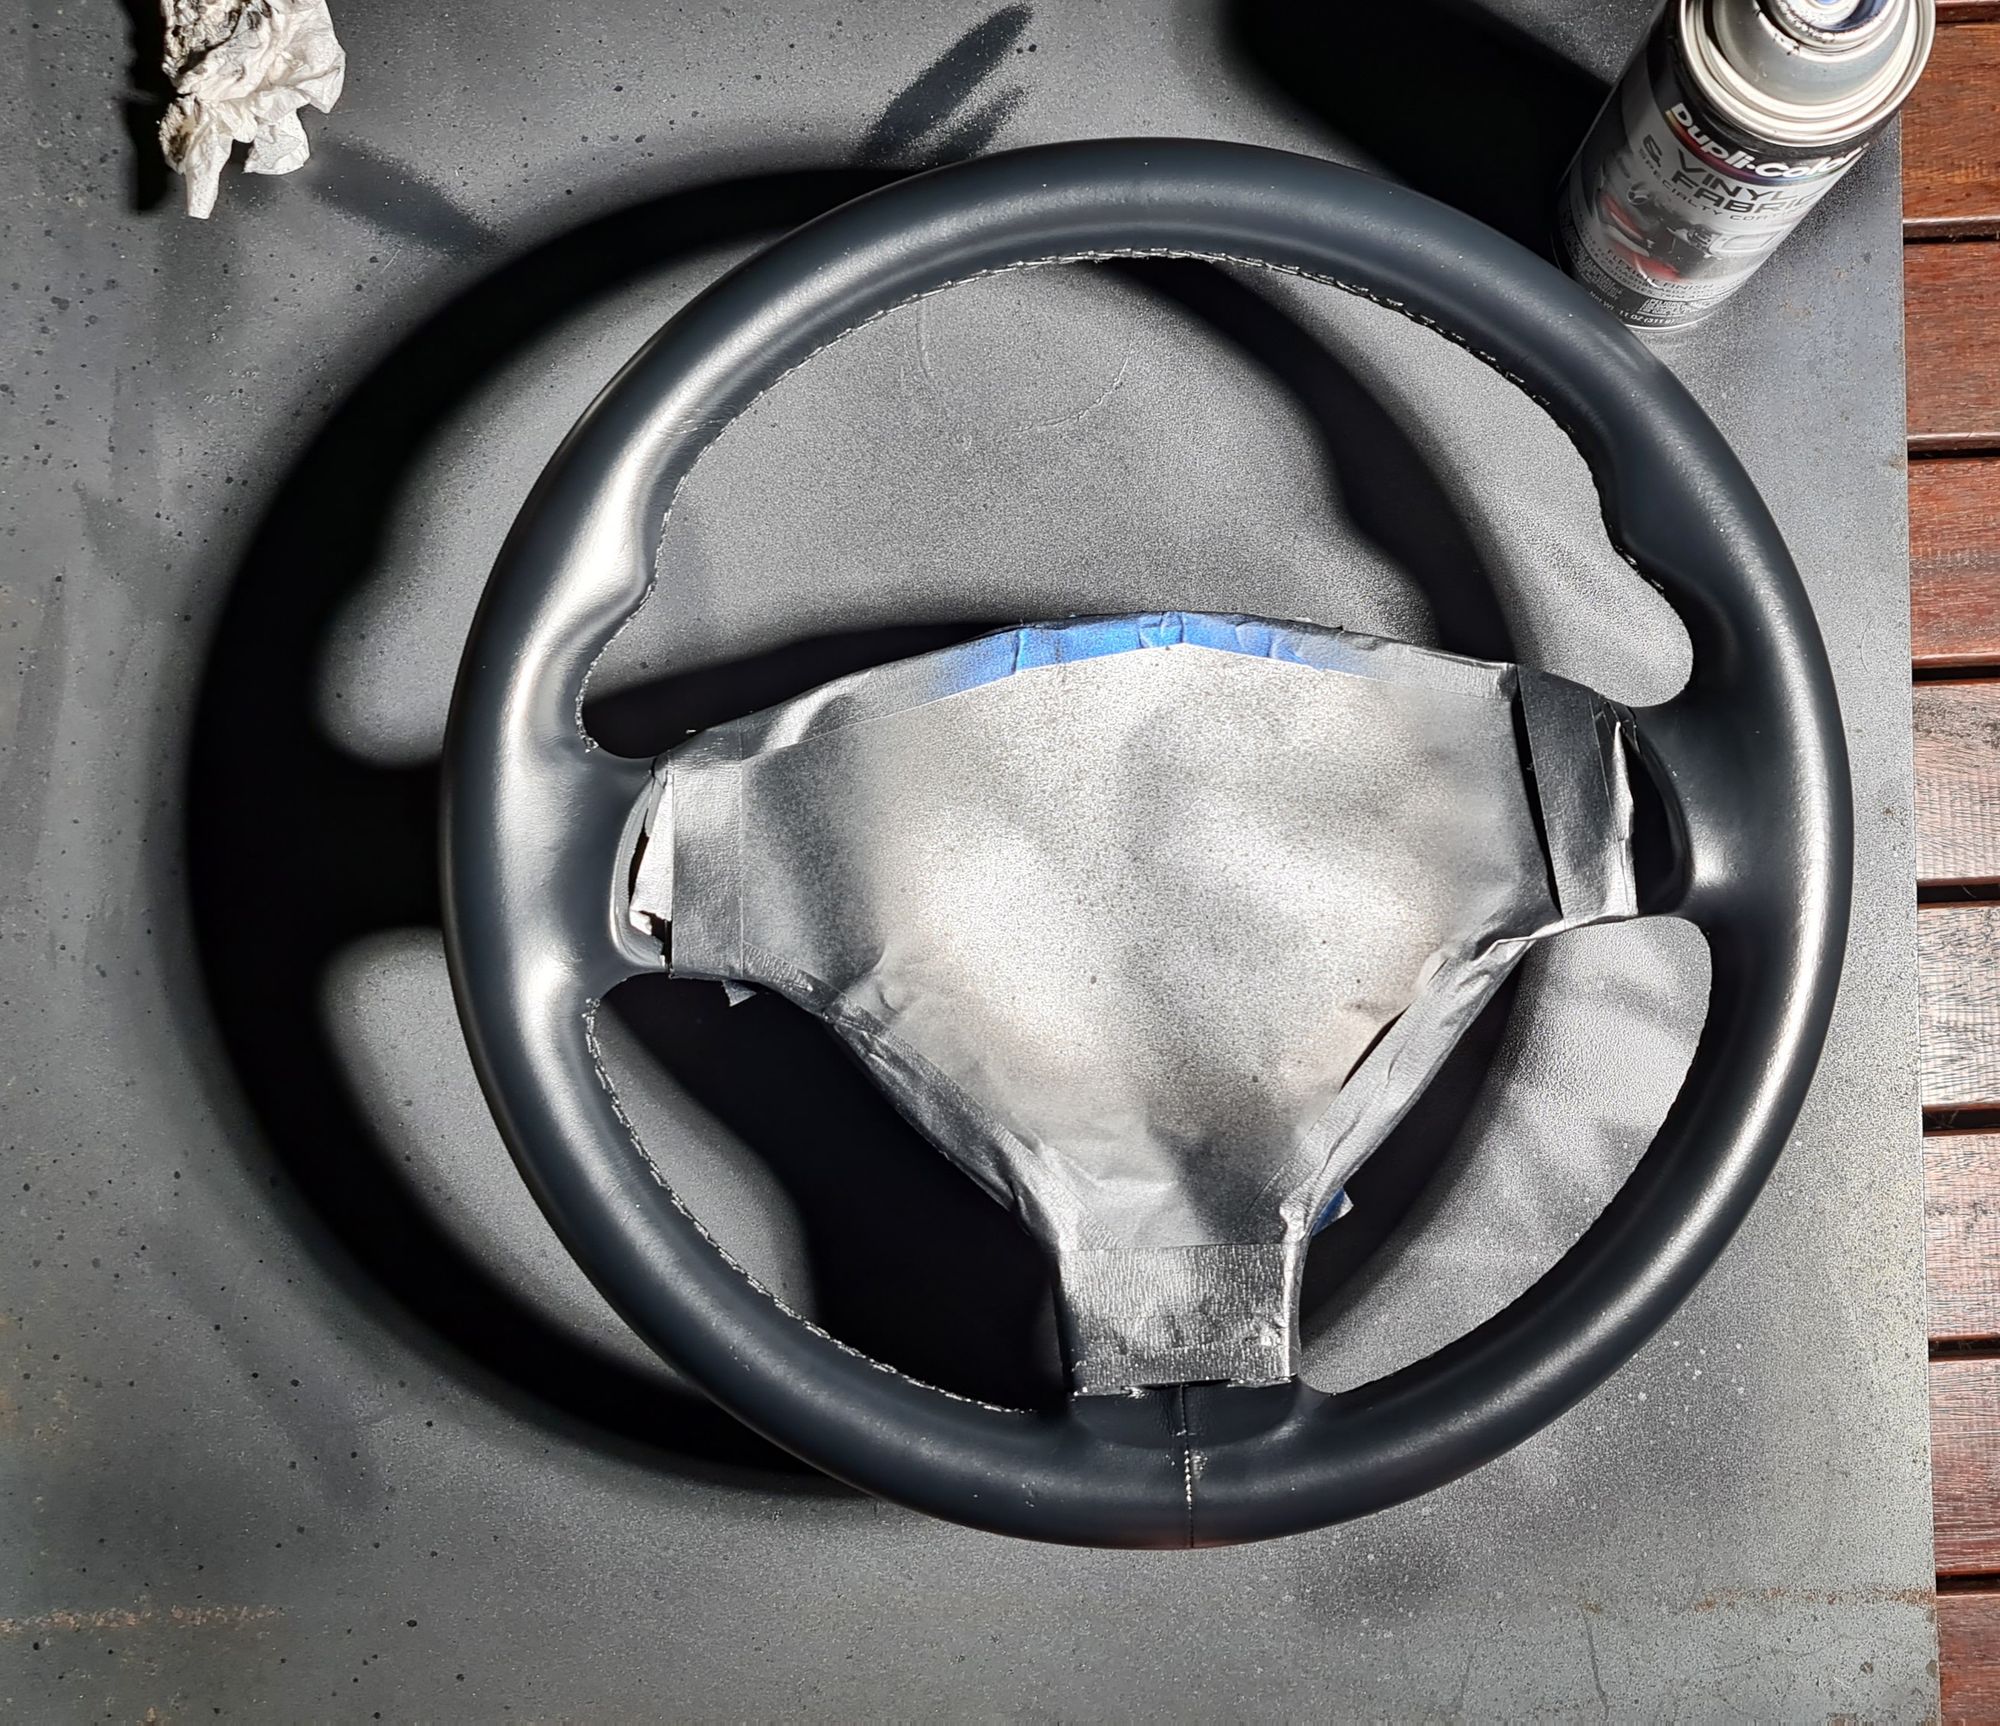
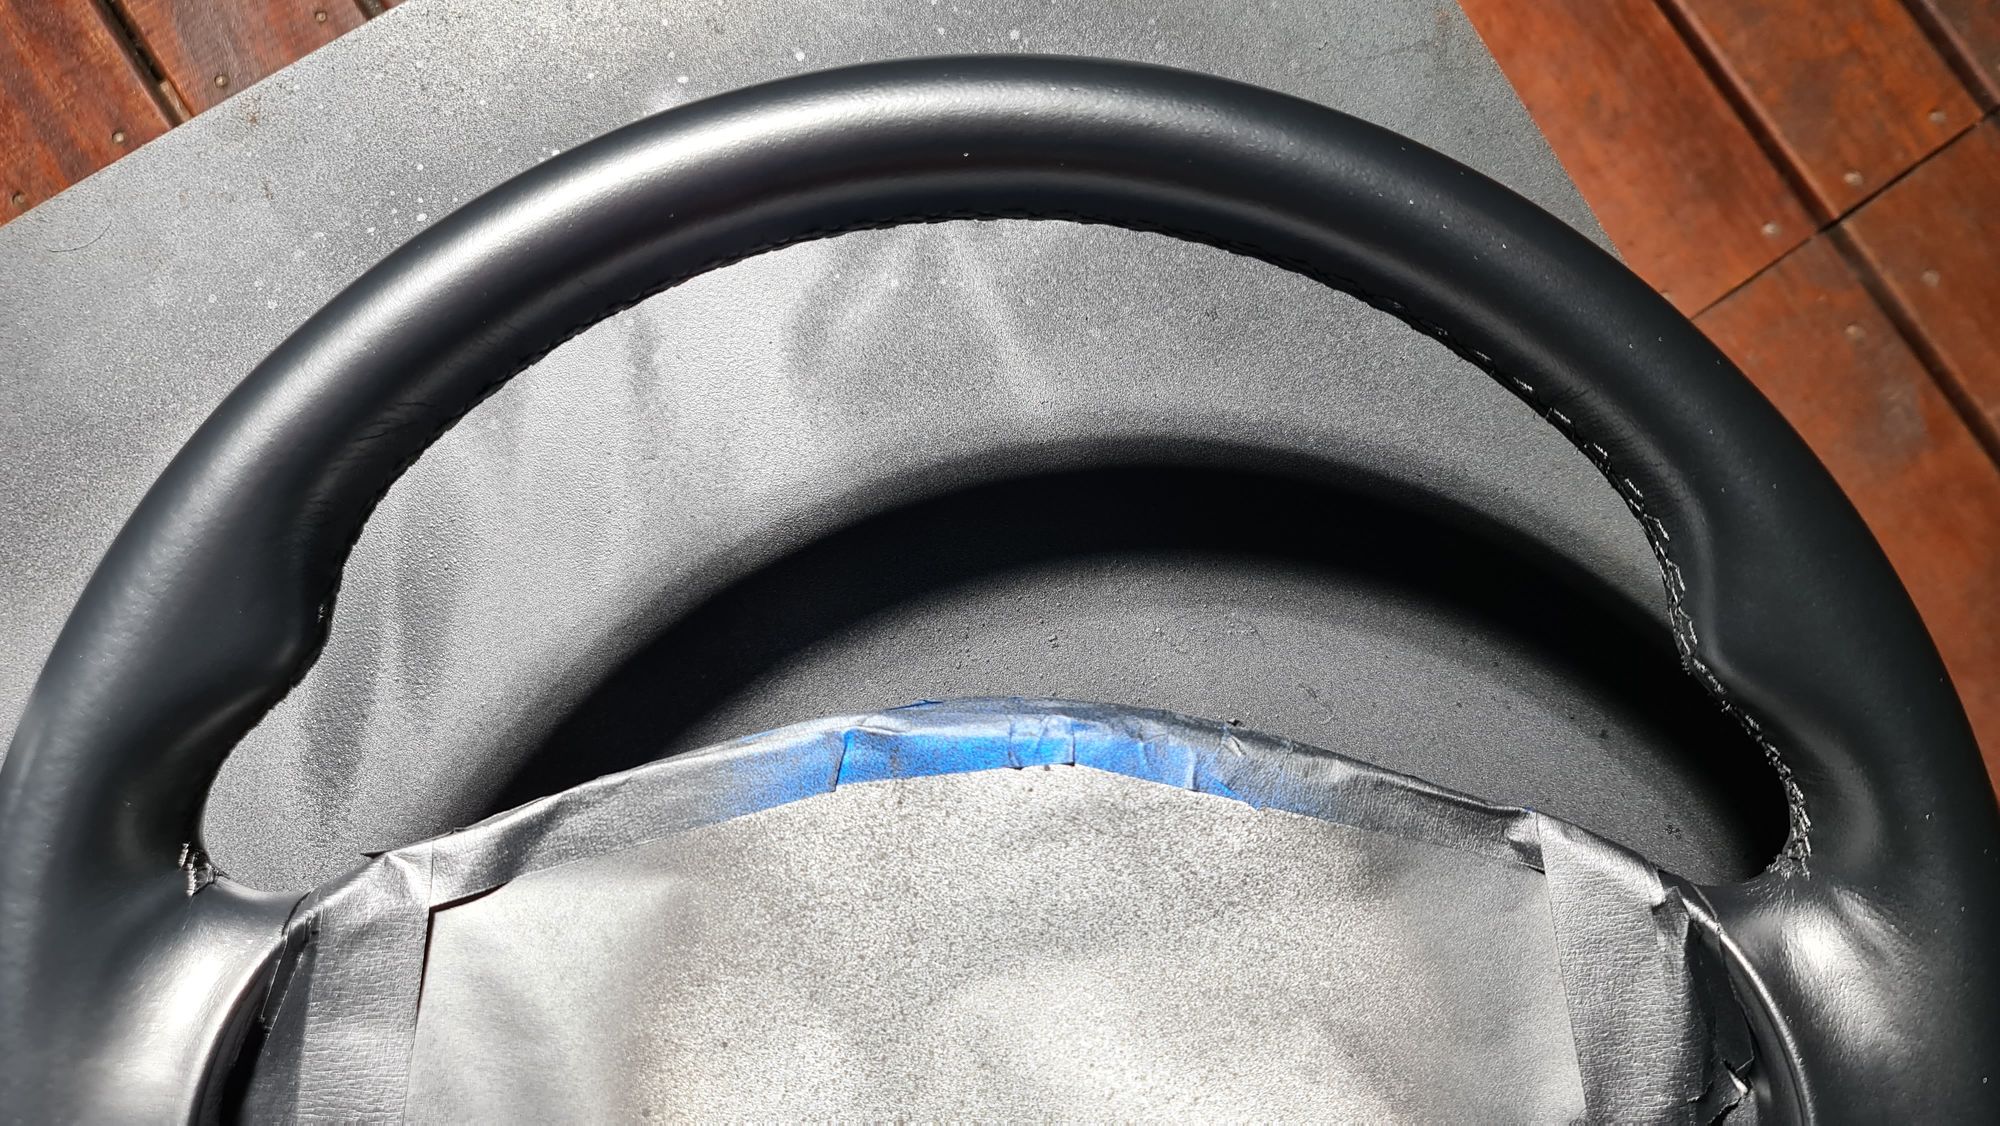
Here is the wheel all masked up, with a bit of filler on the nasty dings and scratches, then sanded with 800 grit, and lightly with 1200 then cleaned up with solvent, so it's ready for the squirting. All surfaces have been lightly sanded to ensure adhesion.
The filler that I used came with a kit called LeatherWeld by JB Weld. It's an okay kit that includes a bunch of acrylic colours for leather touch-up, as well as "Vinyl Adhesive", which doubles as a filler for light scratching, and a few other bits and bobs.
The way that the vinyl adhesive works is that you build it up in layers until the surface is mostly level, then give it a sand with fine grit. It's fiddly stuff, and it's tempting to slather it everywhere, but trust me, don't, or you'll end up in sanding hell. On some of the small dings and scratches I used a bamboo kebab skewer tip, dotting the adhesive where I wanted it, and then drying it, and repeating until level and sanded.
There are probably better fillers out there, but that's what I had in the shed.
It still boils my piss that the scratch at bottom left centre avoided my gaze, and that I didn't fill it. Ah, well.
Many coats later...
I can't stress these things enough if you do this.
- Get the right coating for the job. I used DupliColor Vinyl & Fabric specialty coating in flat black (HVP106), but there are others like it. It's flexible, and ideal for vinyl, leather and some fabrics. Goes on car seats too, so that might be my next squirting project. Do not use regular enamel spray paint. It'll crack, and it'll need a matt clear coat. Which will also crack, probably within six months.
- Use wax and grease remover to clean the wheel before refinishing. Any wax and shit, and the spray won't adhere well. Grab a can while at SuperCheap Auto. Car interior detailing products often contain wax, and that shit has to come off or the coating won't stick. A tack cloth for removing any dust as you go is probably a sensible investment, too.
- Do sand the surfaces, but don't be a knob and wear off the leather texture. That shit looks nice. 800+ grit only. For a very badly damaged wheel you're gonna have to be philosophical about the texture, and sand with more aggresive grit (like 320), fill some, sand lightly, spray some, spray some more, leave it for a day, sand lightly with 800+, then spray some more, or something like that. 800+ will not leave visible scratches (or if you're OCD like me, then 1200+ will definitely not leave visible scratches...)
- Mask after sanding, and mask well. There are connectors in your wheel for things like airbags, so best not to bugger them up. Plus the back of the wheel is vinyl, and probably in good nick, so don't bother touching it. Or do. Your call. I didn't need to, so didn't, and masked it too.
- If you can see or feel imperfections at the start, then you'll still see and feel them at the end. For visually offensive stuff, fill it, and sand it well 'till smooth, and it'll be gone. If it's not offensive, then leave it alone. Really. You might make it worse than it already is, especially if you're a newcomer to this business. Take your time. But then again, a heat gun or hair dryer to bake the filler is great for the impatient... like me.
- The first coat is just a dusting. An "adhesion promoter", if you will. The second coat is another dusting. The third and more? Yep. Dusting, but only a little bit more heavily. Do not be tempted to lay down too much on each coat... the results will come. It only takes about ten minutes between coats in decent weather, so chill. Options: Have another beer. Relax. Smoko. Then give it another shot. Then rinse and repeat. I advise two six packs in the fridge to avoid running out for this job.
- The tin says touch dry in 30 minutes, re-coat in one hour, and full cure two days later. I didn't do that, given the very light coats to avoid any dripping. It was about 25 degrees Celsius when I did this (~77F), and each coat was touch dry very quickly. This is a lacquer coating, not an enamel paint, so there are no hard and fast rules about re-coat times. If the weather is colder, then stretch out the re-coat time. If it's hotter, then re-coat can be quicker than ten minutes. That, or just enjoy more beer because it's hot.
- Do not spray thick coats. It will run, and you'll end up shit creek without a paddle. Second hand wheels are expensive, and new ones are really expensive, especially the M-Sport ones, so keep that in mind. And second hand ones won't be perfect, so you'll get even more painting practice if you fuck up your original. If you spray thick coats, then you almost certainly are buying another wheel. I warned ya.
- The DupliColor spray cans tend to spatter a bit if held almost horizontally, so watch that. If it does spatter, then raise the tin and go over that area immediately with another fine mist and it'll smooth out. Don't touch a spatter mark. Use good lighting while spraying so you can see them if they happen.
I ended up doing about ten light coats to get full coverage. You can see the rash at the top of the wheel gradually disappear as the coats go on in the photos below. When it was mostly done, I concentrated two more light coats on the rash at the top half of the wheel because there was almost no coating there to start with, so that bit ended up with about twelve thin layers.
Most of the progressive coats:
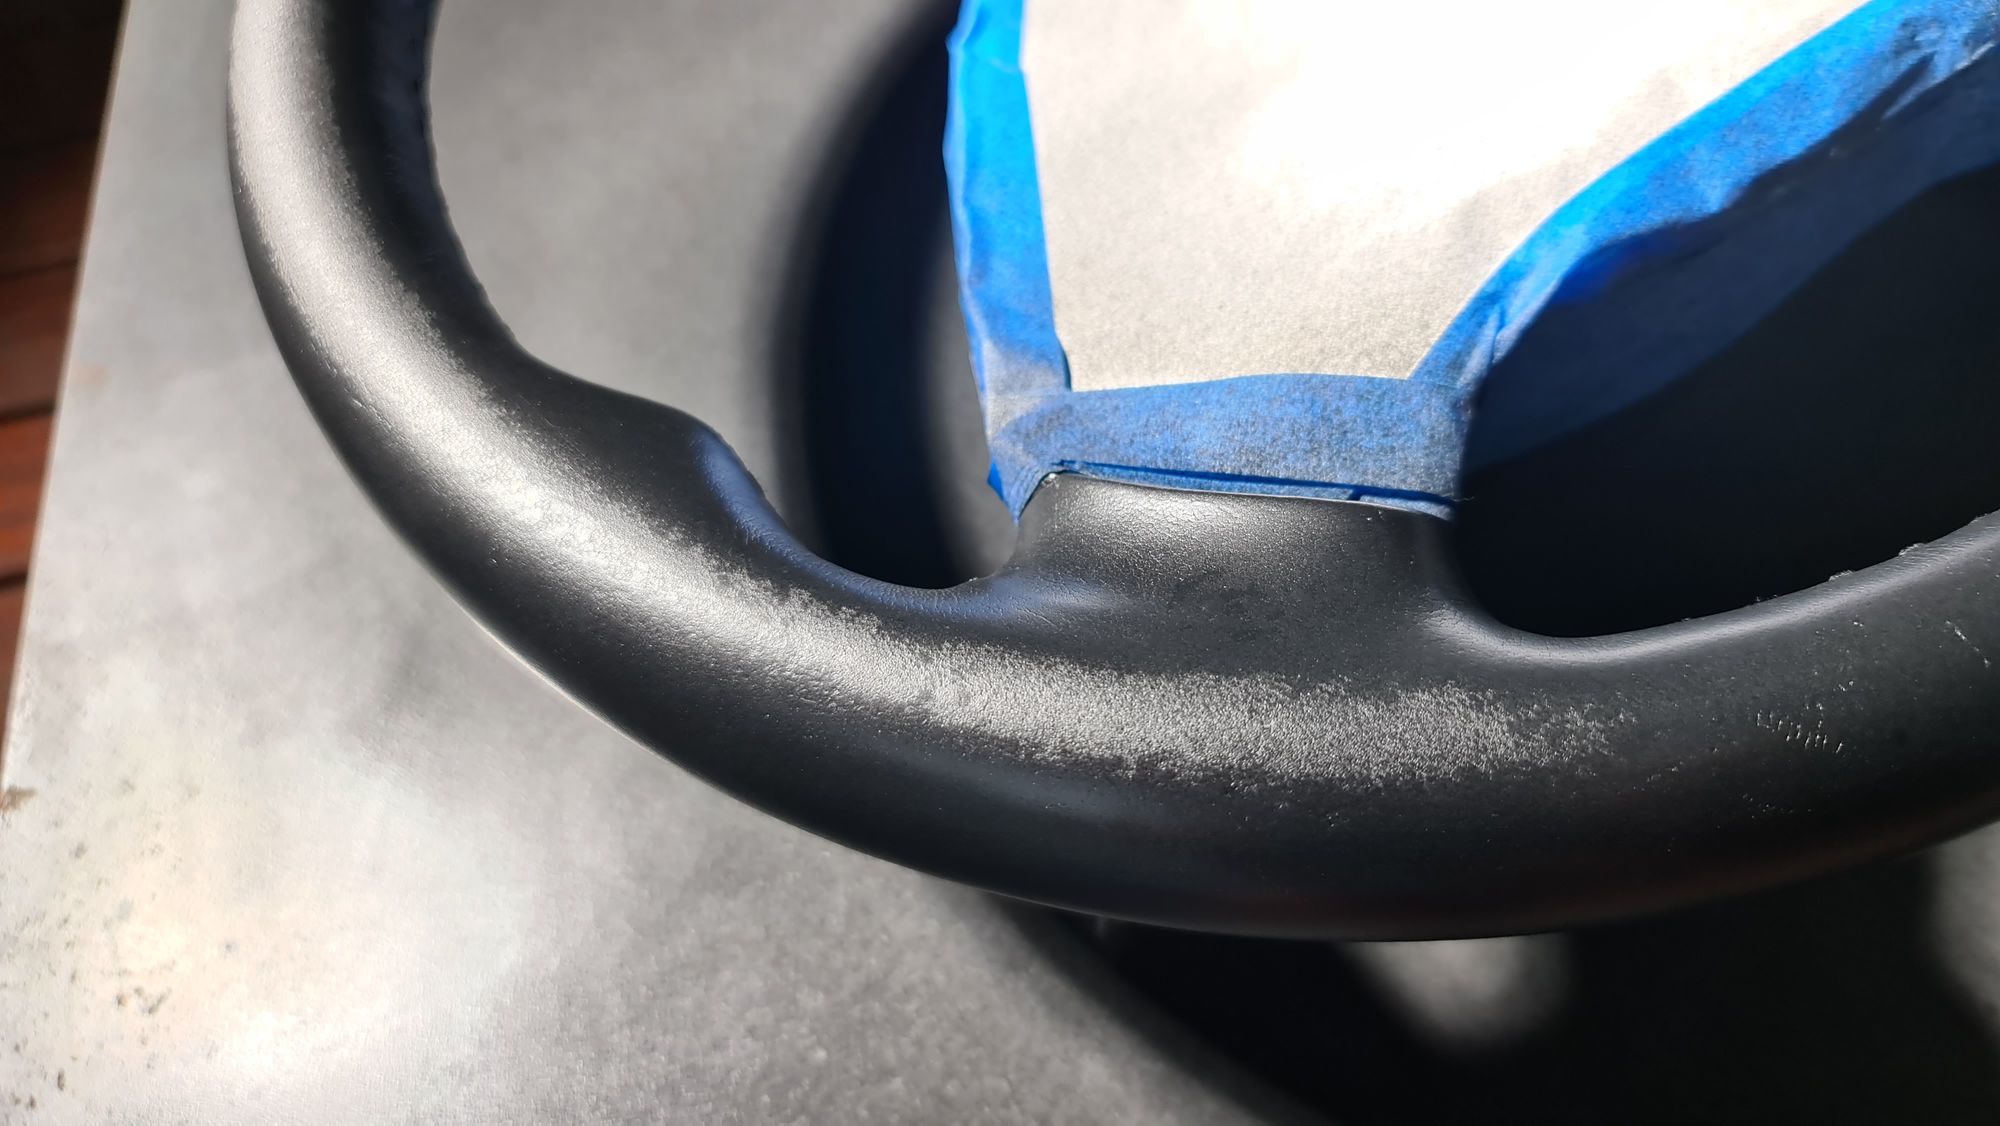
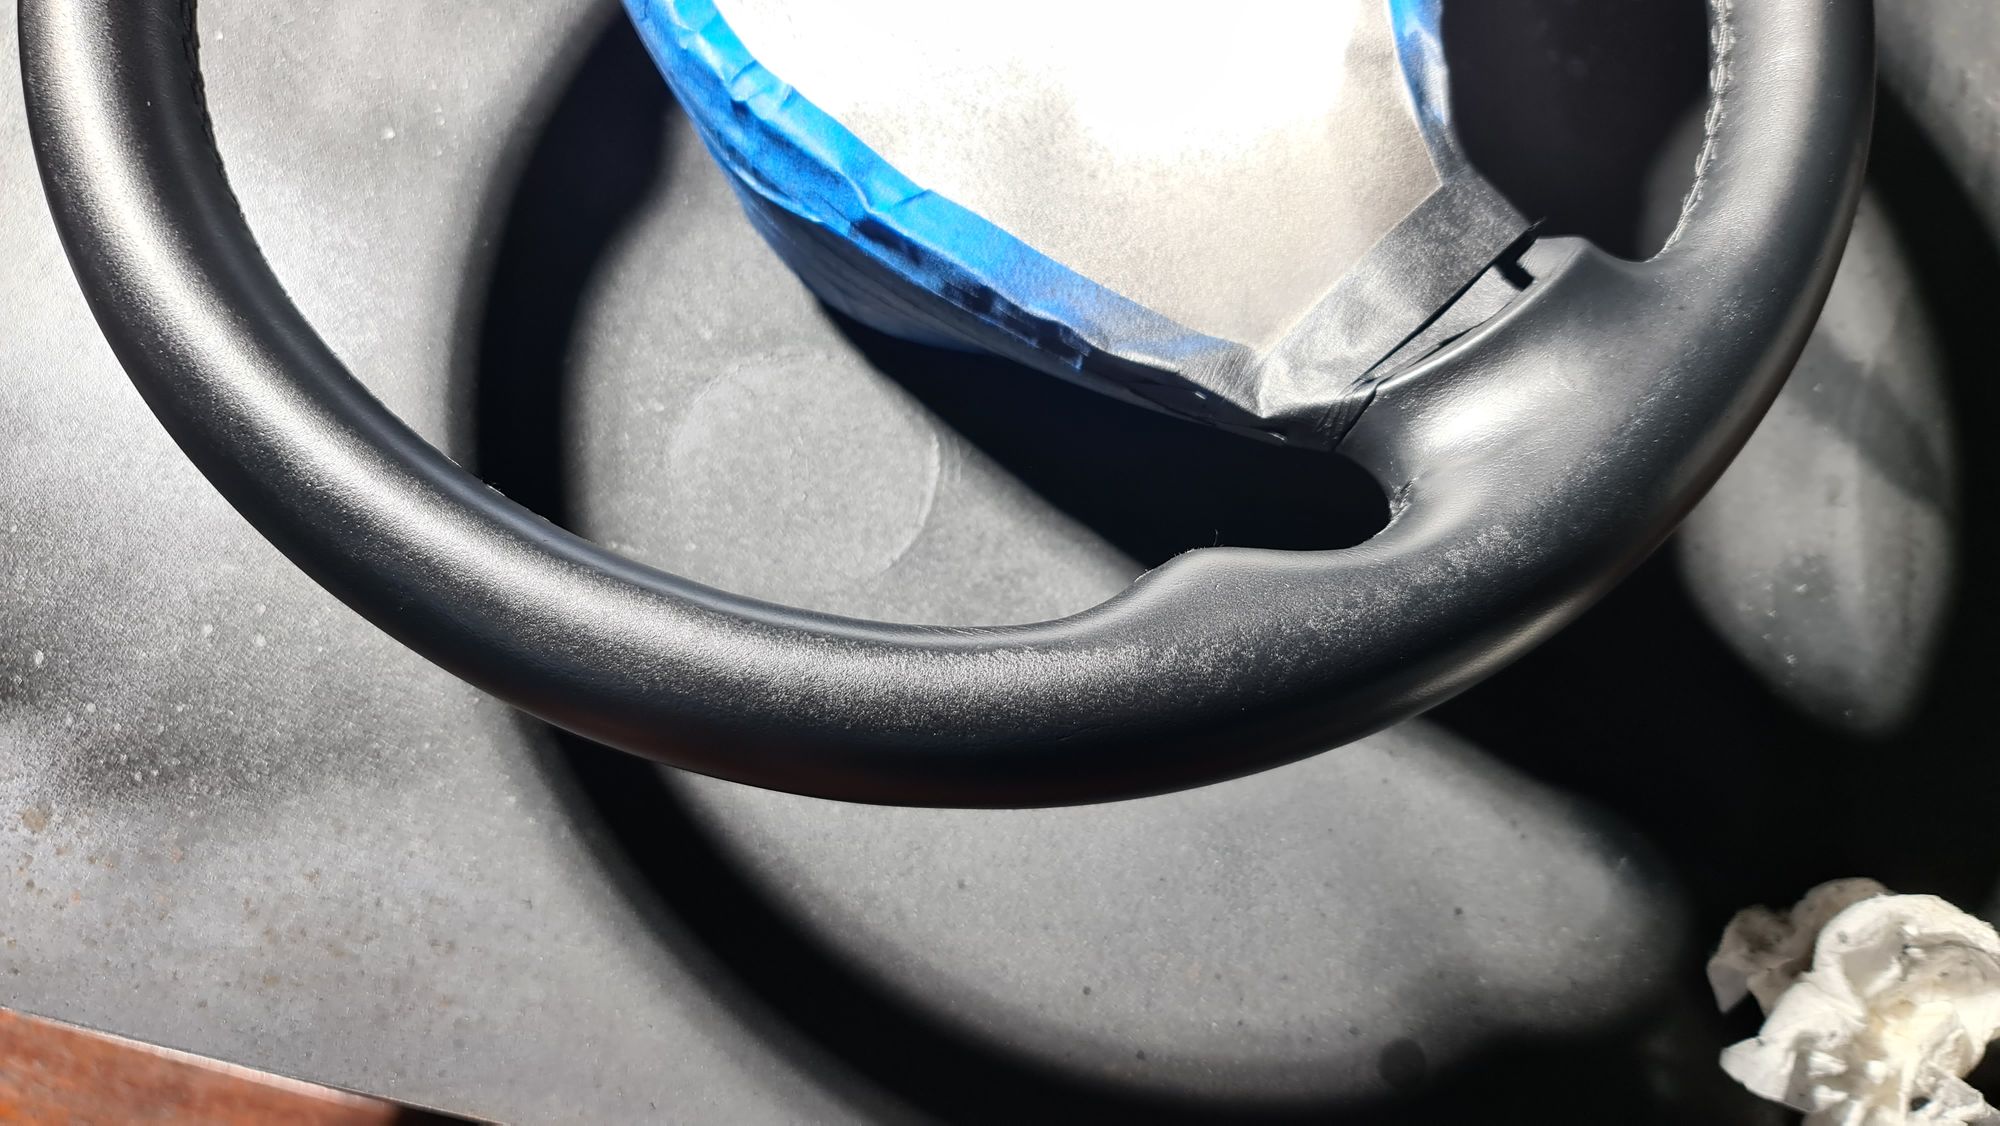
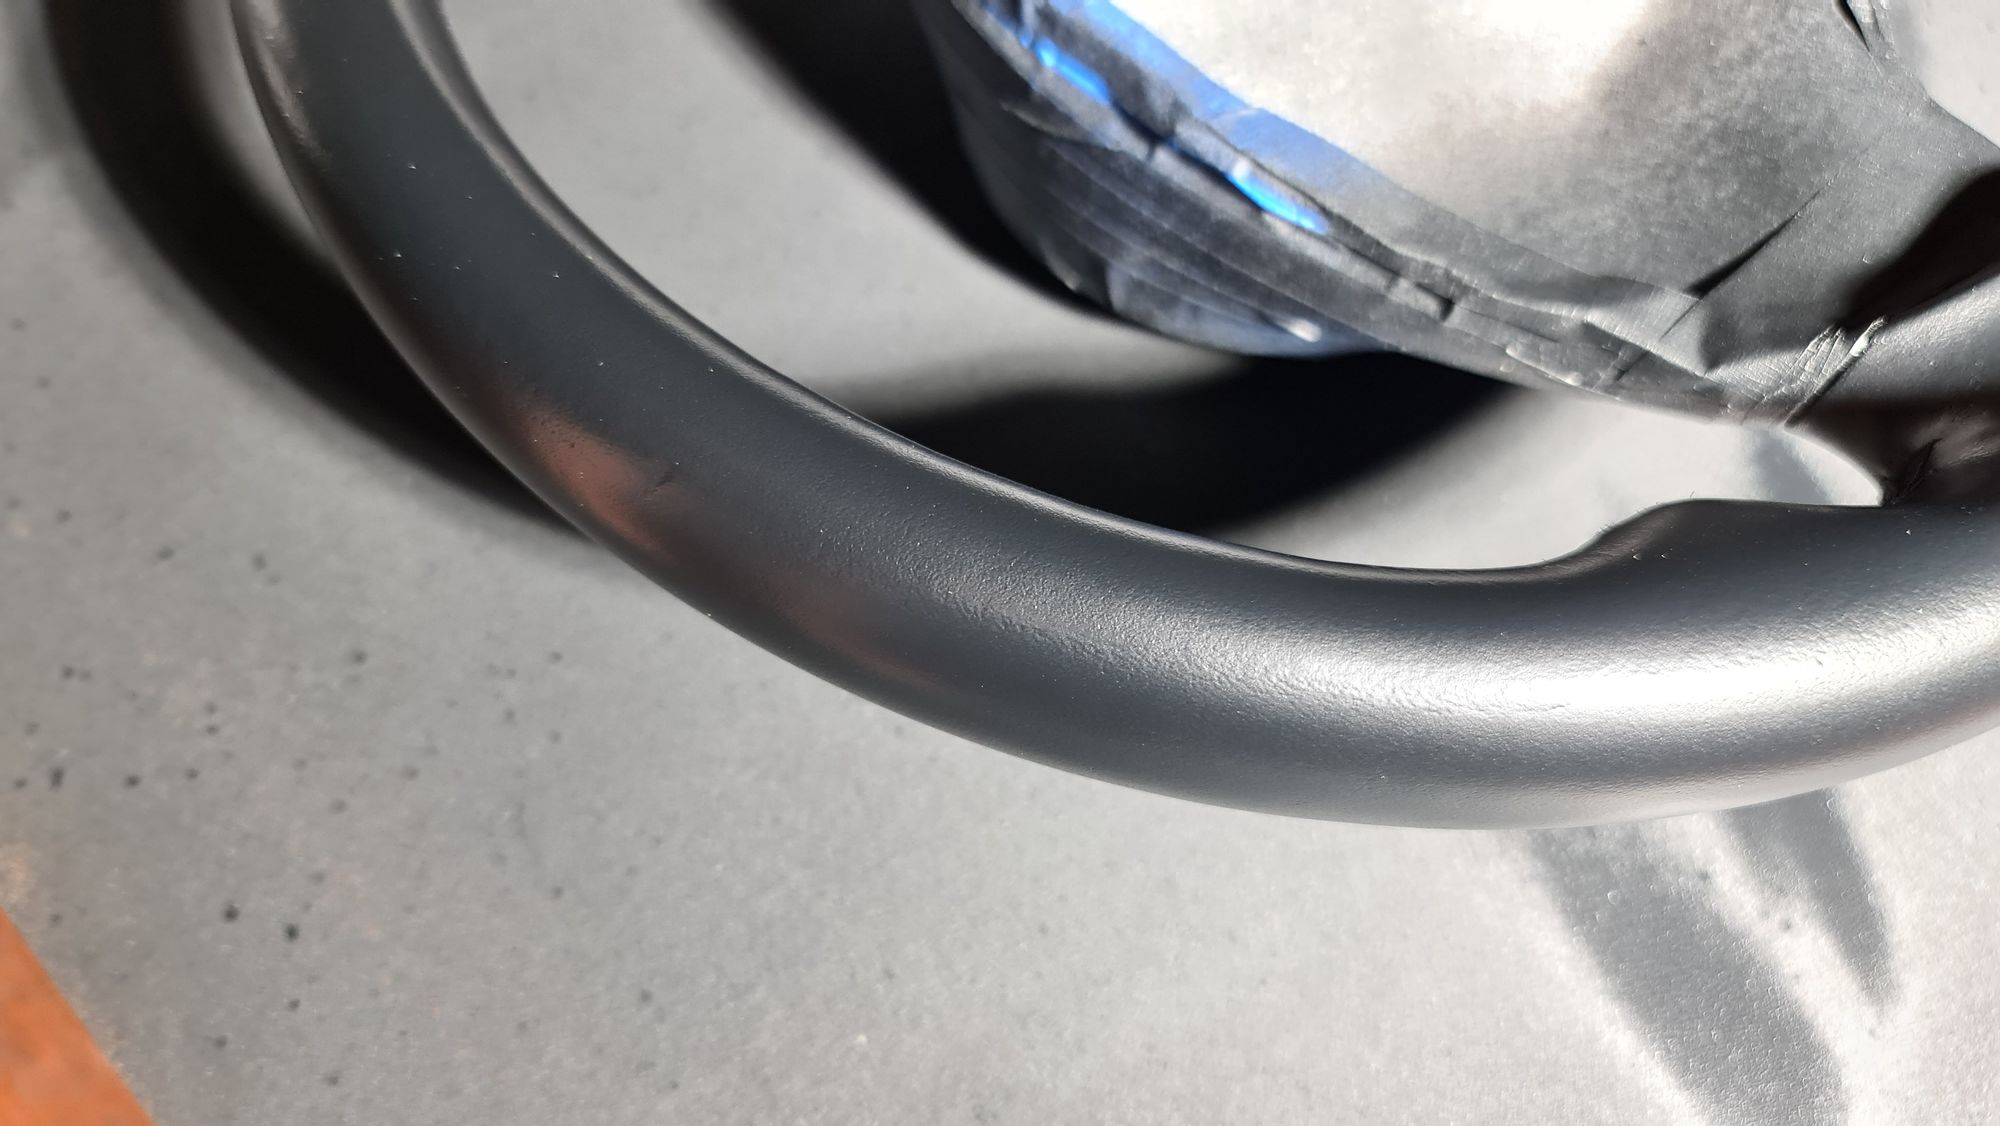
This kind of specialty coating does not need a clear coat on top, so keep on dusting it on until the nasty rashes like I had are all but gone. You'll end up with a nice matte finish that has a little bit of lustre to it (I wouldn't call it "flat" black, like is written on the tin though), and when that happens after a ten-minute-to-touch-dry visual check, you're done. Or maybe just one more light coat, like I couldn't help doing, but don't over-do it, or you'll fill too much of the leather texture. That's another good reason for really light coats, aside from avoiding drips; you can concentrate on the bits that still look like they need another coat.
After filling, elbow grease, sprays, a six pack-o-beer and four hours later...
New. Ish.
Install
Once finished to perfection (or close, because it's old), leave it for forty eight hours to cure.
Seriously. Two days. Or around one if the weather is dry and stinking hot.
Don't poke it. Don't be tempted to touch it much, and definitely don't scratch it. Just let it sit for a couple of days. You can carefully peel off the masking after an hour if you must, like I did. Hopefully you didn't stick any of the masking to the spray coating. If you did, then you used layers that were way too thick.
And then whack it back on the car, getting it perfect because you marked where it came from, and marvel at how clever you've been for less than AUD fifty bucks plus beer money. (I'm tipping USD30'd do it. Plus beer.)
Installation is quite obviously the reverse of removal. Less the cursing trying to get the airbag off, of course. E46 spec is 80 Nm (59 ft-lbs) for the centre bolt, in the hope that you own a torque wrench. Do look up your car's specs. And go buy a torque wrench, because it's important doing up bolts on cars so you don't under or over-tighten them. You will use it again.
Apparently you can use your favourite interior detailing products on it once it cures, and I'd leave it a week, but it's a steering wheel, yeah? I don't want mine all slippery, or slimy or sticky, so none of that gunk will be used here. Just Jay Leno's Garage all-purpose cleaner, which is gold (no sponsorship), but next time thankfully it won't remove any black dye.
Cheers.
That's what I did, but as always, your mileage may vary, so be careful.